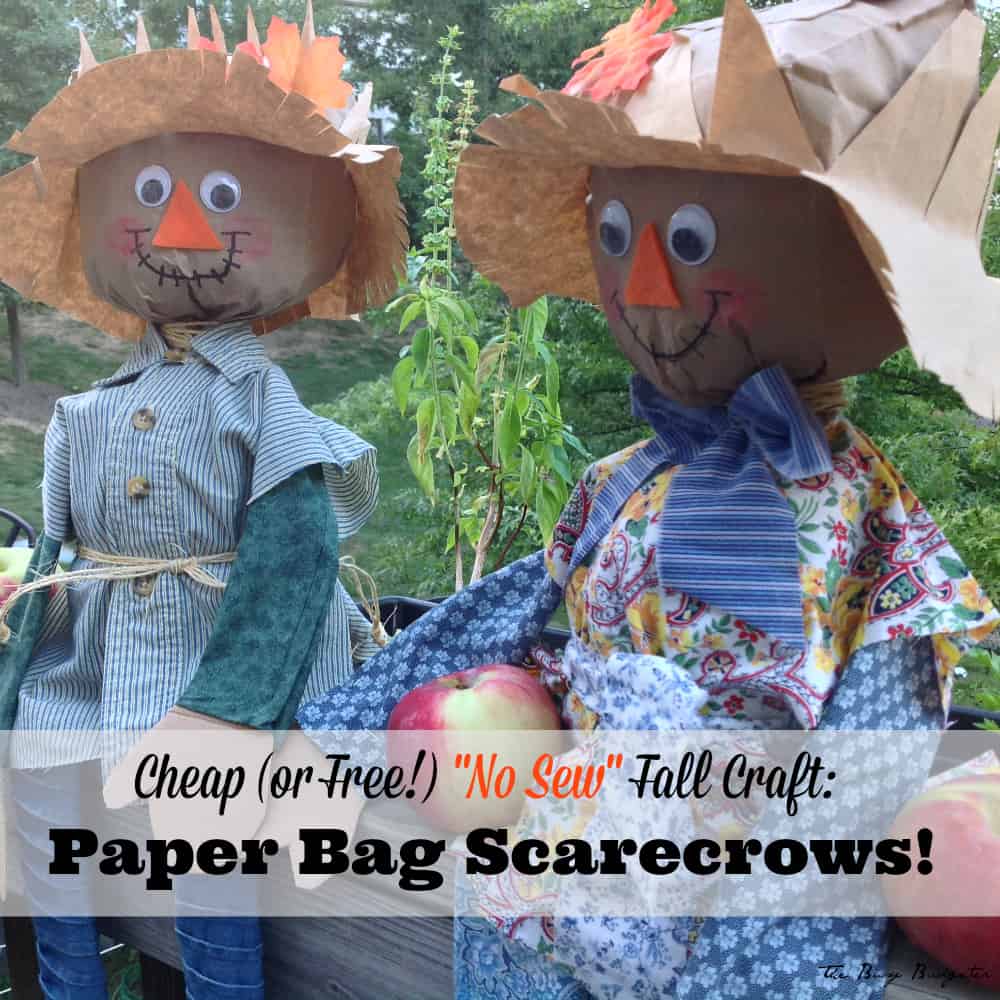
A Cheap and Easy Fall Craft! “No Sew” Paper Bag Scarecrows!
Cheap (or Free!) and Easy Fall Décor: Paper Bag Scarecrows
A great idea to sell at craft sales!
My Mom works for an amazing non-profit that holds a craft/bake sale every year to raise money for her organization. About 10 years ago, they started making these paper bag scarecrows for almost nothing. They sell them for $5/piece and always ran out and had to start taking orders. The best part? 10 years later, she still sees the original scarecrows come out in October in co-workers desks and offices. A cheap paper bag craft that lasts 10 years, looks adorable and can make you money? That’s called a win folks! The secret here is to use what you have around the house and not buy anything. Most of the needed materials can be easily substituted out. Have fun with it!
Materials Needed:
1. Brown paper “lunch bags”.
2. Stapler (we ran out of staples making our second scarecrow and just hand sewed, but staples are much easier!)
3. Scraps of fabric (feel free to use old clothes!)
4. Googly eyes (optional, they’re super cute- but you can also draw on eyes.)
5. Marker or Crayon.
6. Crumbled newspaper or plastic grocery store bags (about 10).
7. Embellishments (optional)- real leaves, fake leaves, acorns, pinecones etc.
8. Hot glue gun or glue stick.
9. Cardboard box (I save Amazon shipping boxes for things like this).
10. Tape, string or ribbon.
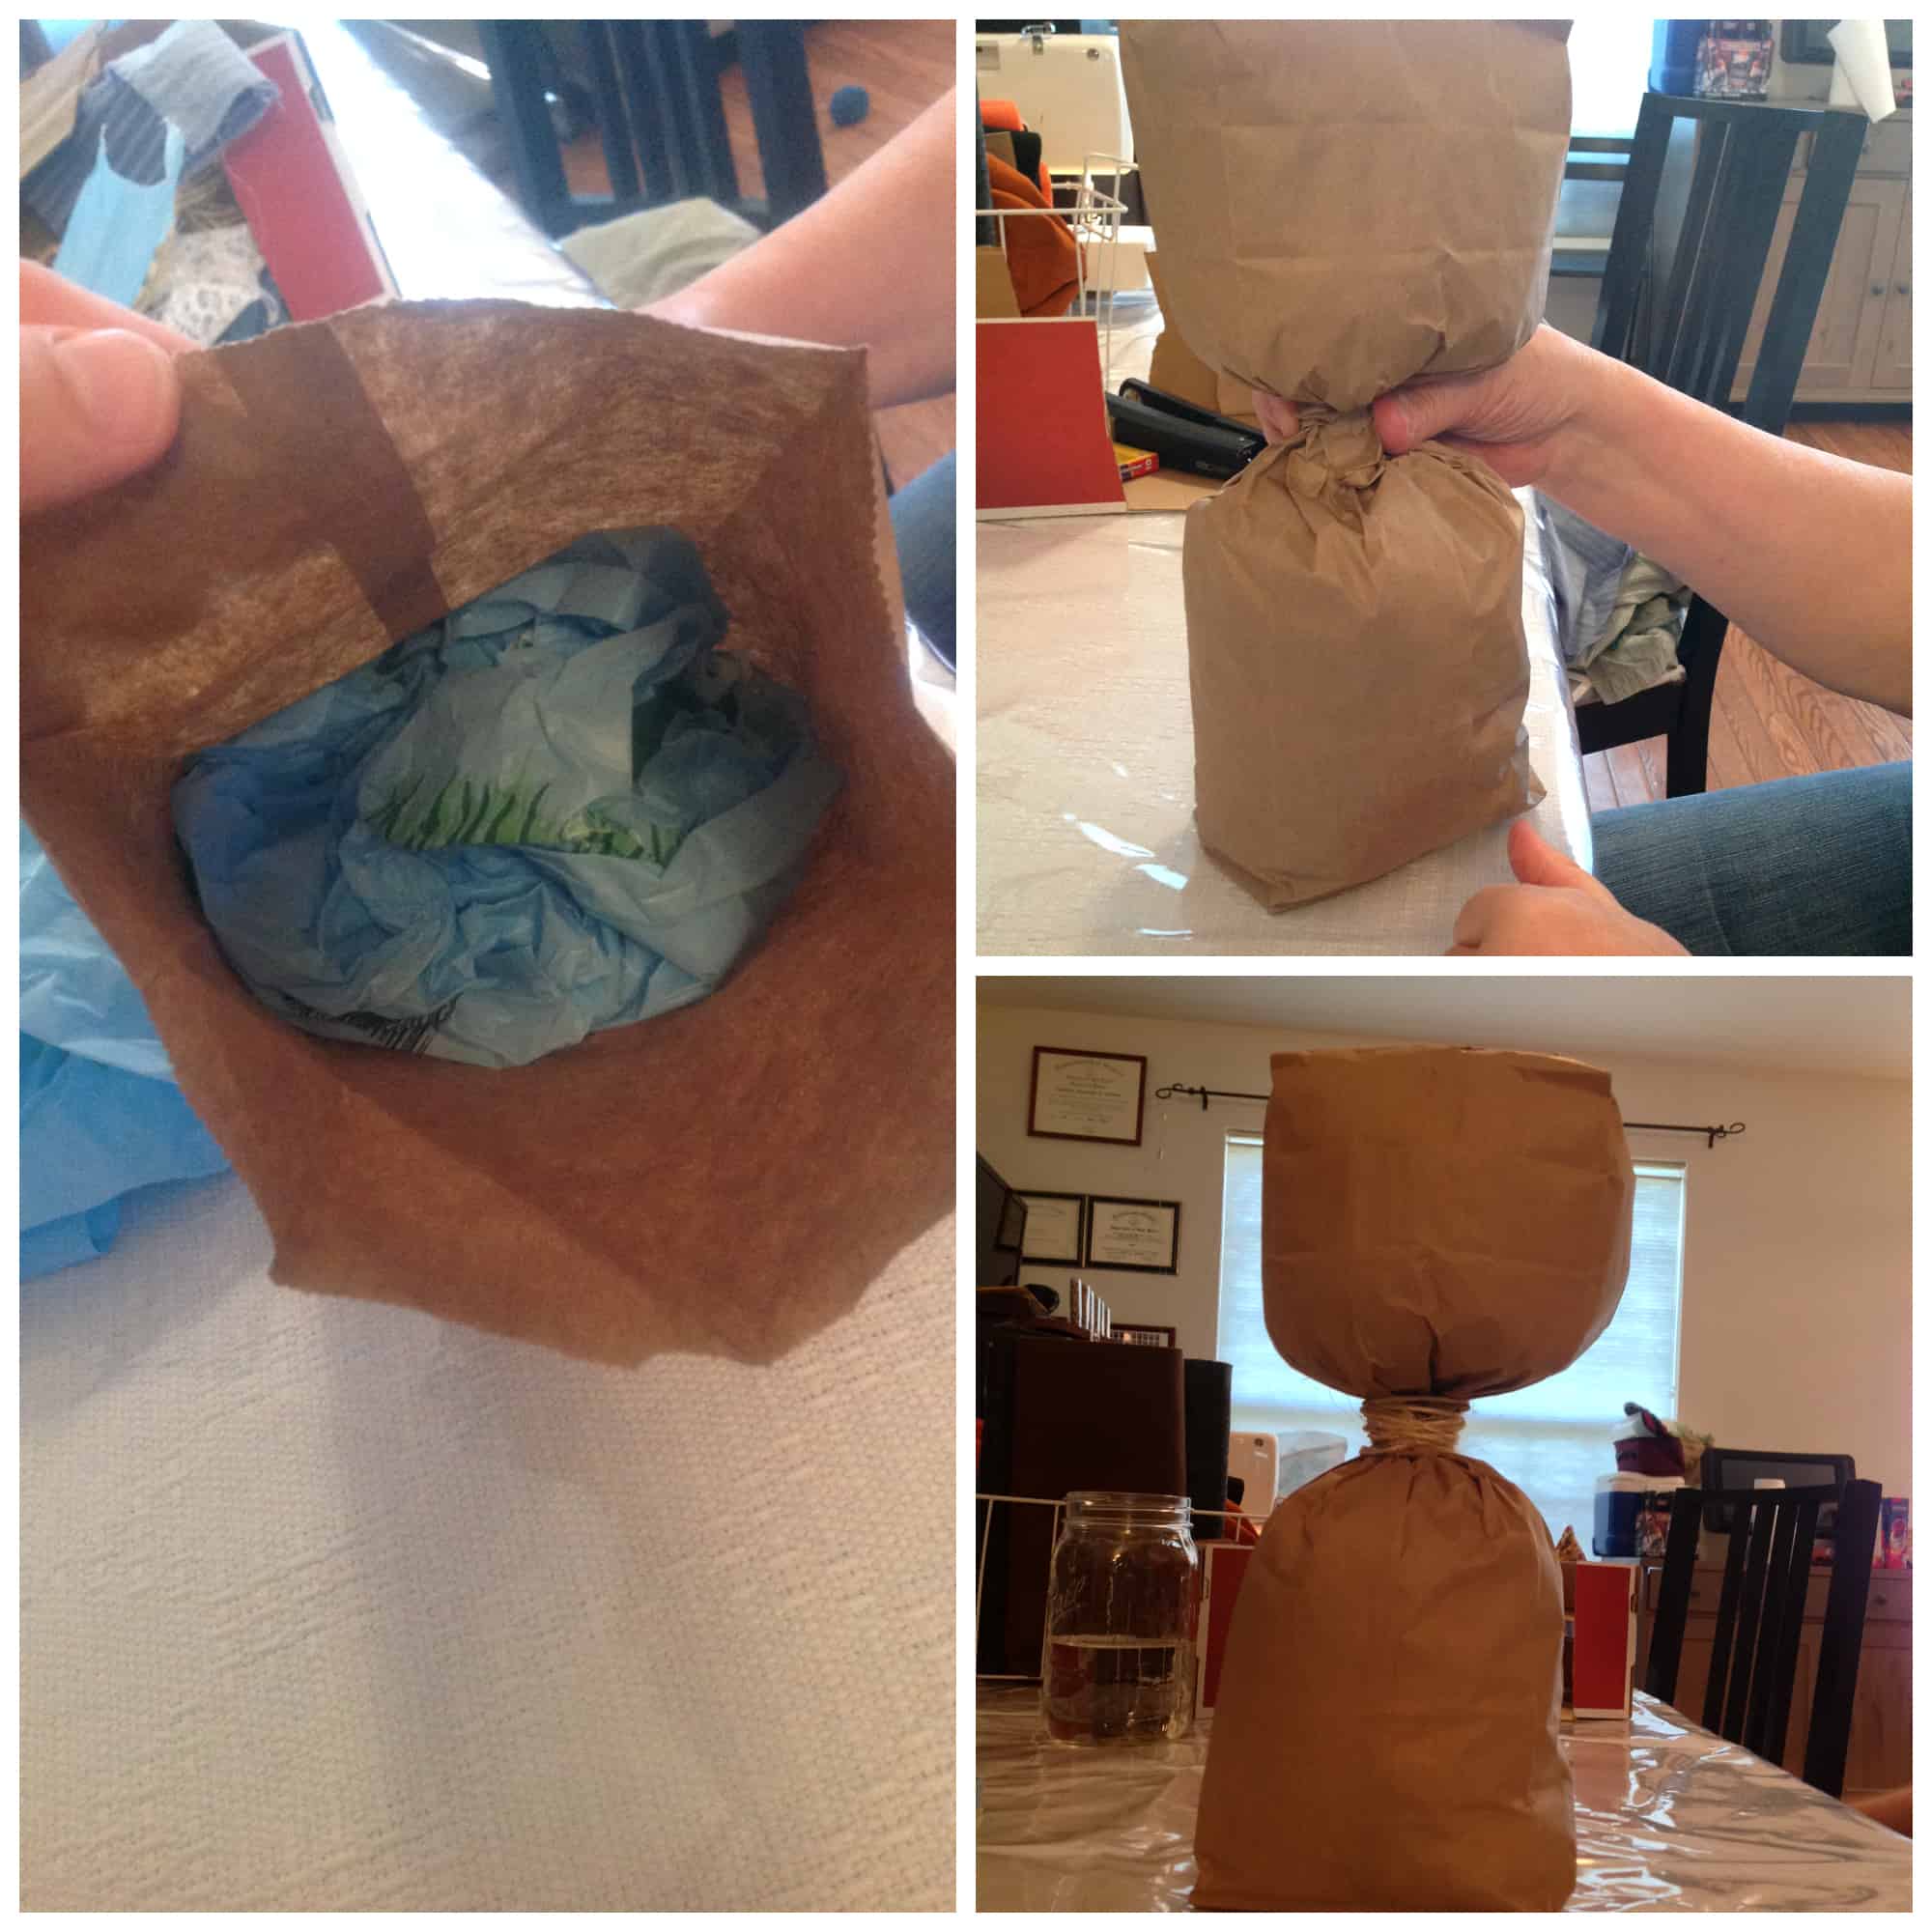
Step 1:
Open a brown paper bag and stuff with either newspaper or plastic grocery bags about half full, pack it semi tightly and try to round it out a little. Stuff a second bag ¾ full with newspaper or grocery bags. Twist the top of the second bag and insert it into the first bag. Twist the “neck” of where the two bags meet and tie off tightly with tape, ribbon, or string. The smaller bag is your head and the larger bag is your body.
Step 2:
Using a cardboard box, cut out a hand shape and a foot shape like the photo below. Using the shapes that you just cut out, trace them on cardboard and then cut out a second set.

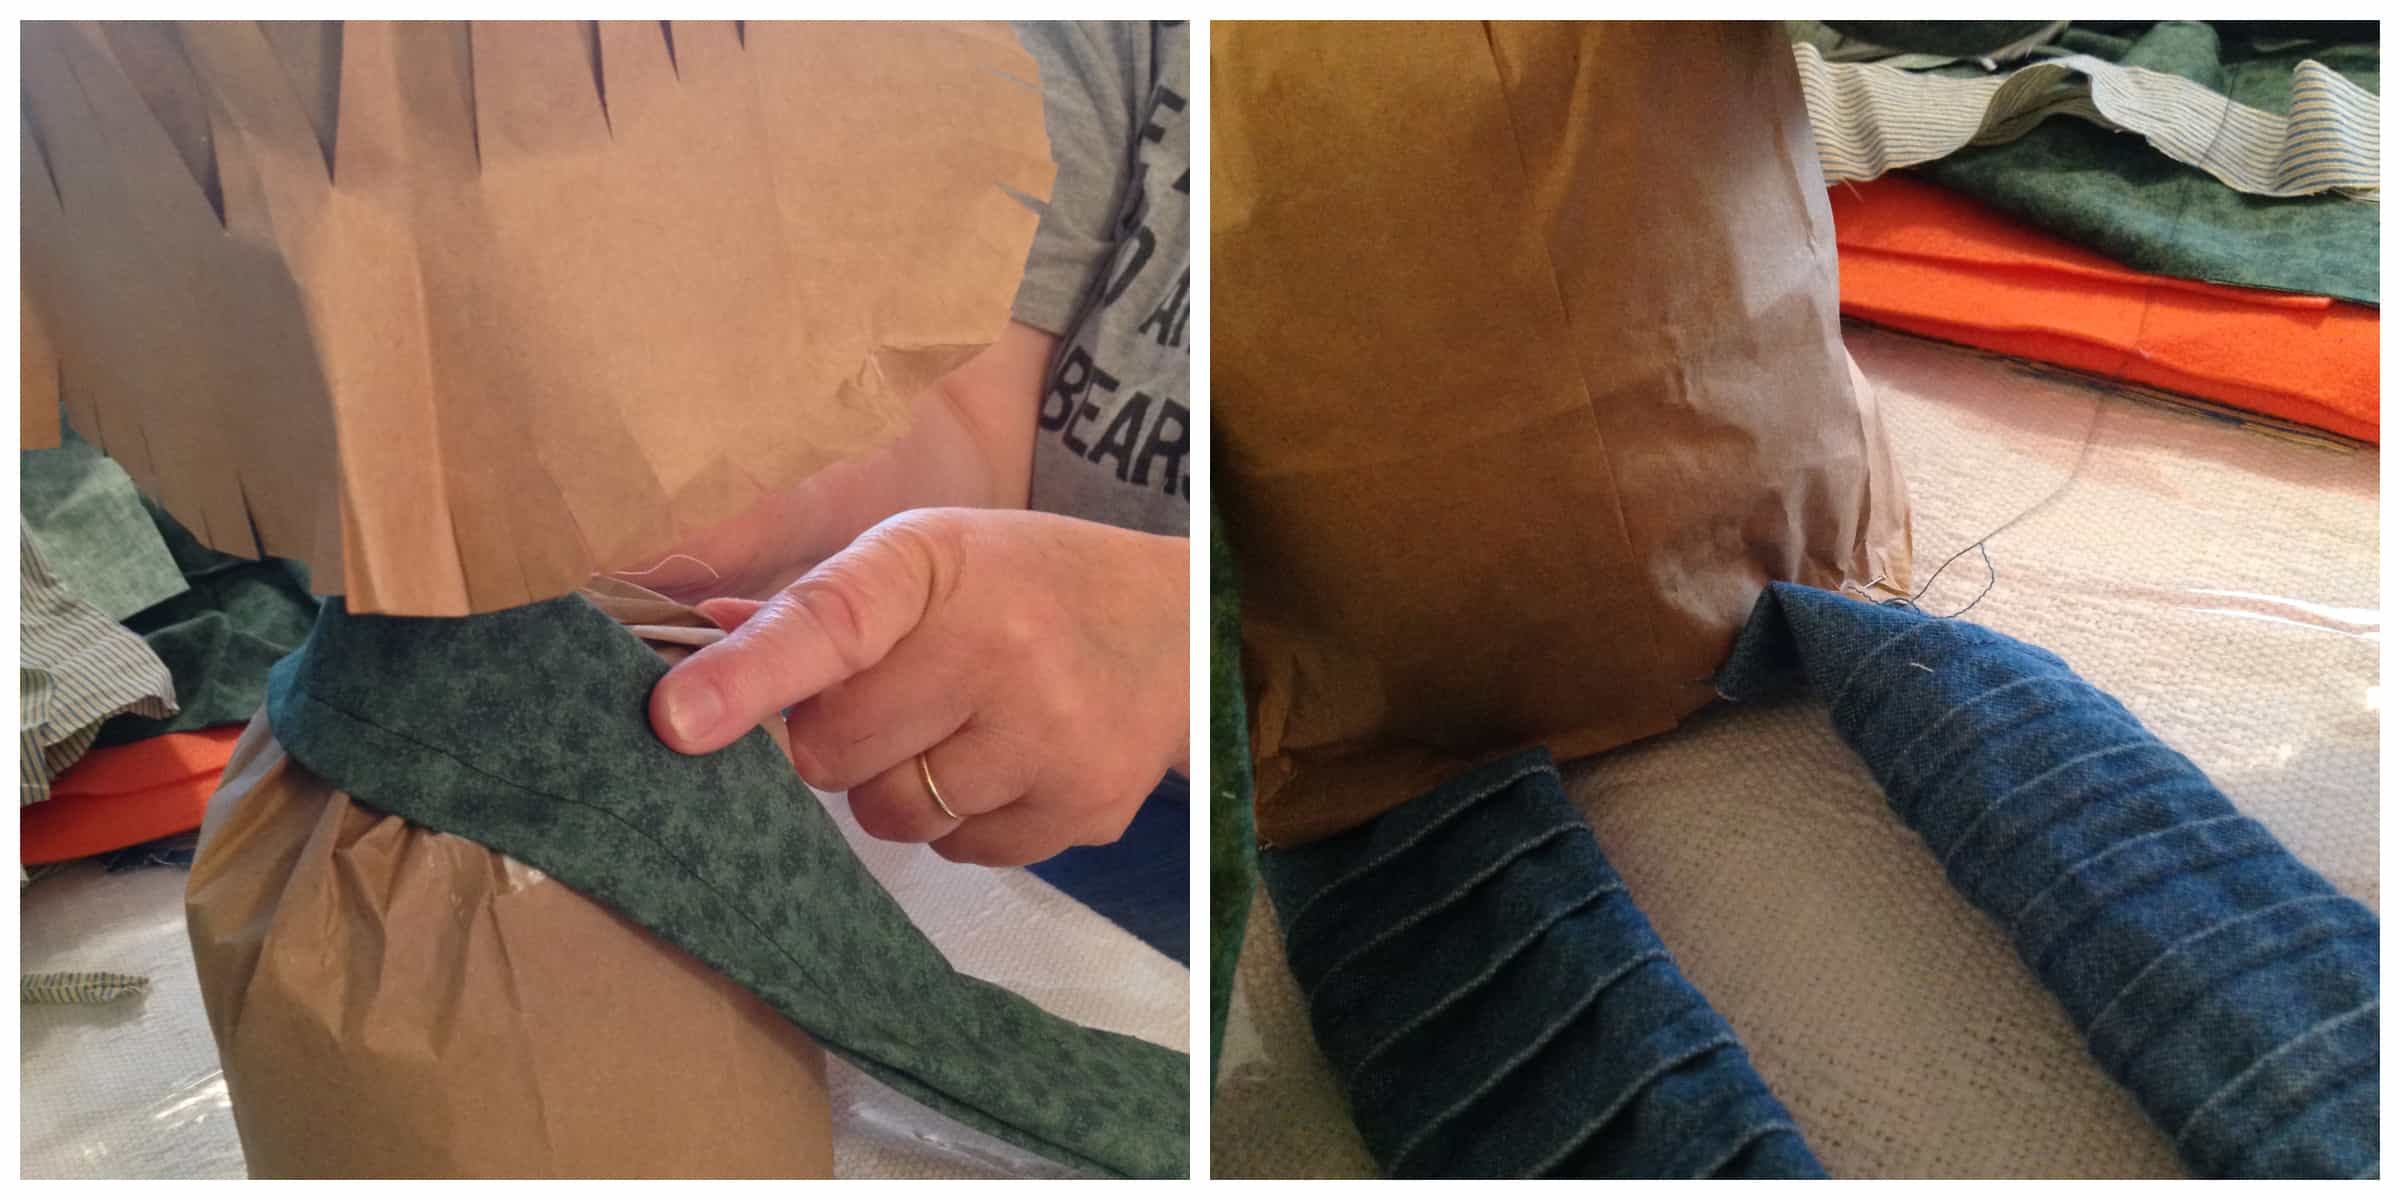
Step 3:
Cut arms and legs out of fabric. Use one long strip of fabric to wrap around the scarecrow becoming arms (see photo), stapling the seams closed at the back and sides. Use two long lengths of fabric to become legs. Fold the fabric and staple the seam. Fold up the bottom “hem” and stick your cardboard feet inside, then staple the cardboard to the fabric leg. Do the same with either side of the arm fabric using the cardboard hands.

Step 4:
Attach the legs to the body using staples. Attach the arms to the back of the body and wrap around to the sides, attaching there as well. You should now have a head, body, arms, legs, hands and feet.
Step 5:
Cut a large circle out of a paper bag to fashion as a hat, make it about twice the size of the head. Fold the circle into quarters (see photo) and snip off the corner. Create jagged edges around that inner corner that you snipped, so it spikes up around the head. Fringe the outside edges. Push the head through the hat. Once you have a good fit, glue it in place. If you’d like to add decorations (leaves, etc), glue them in place now.
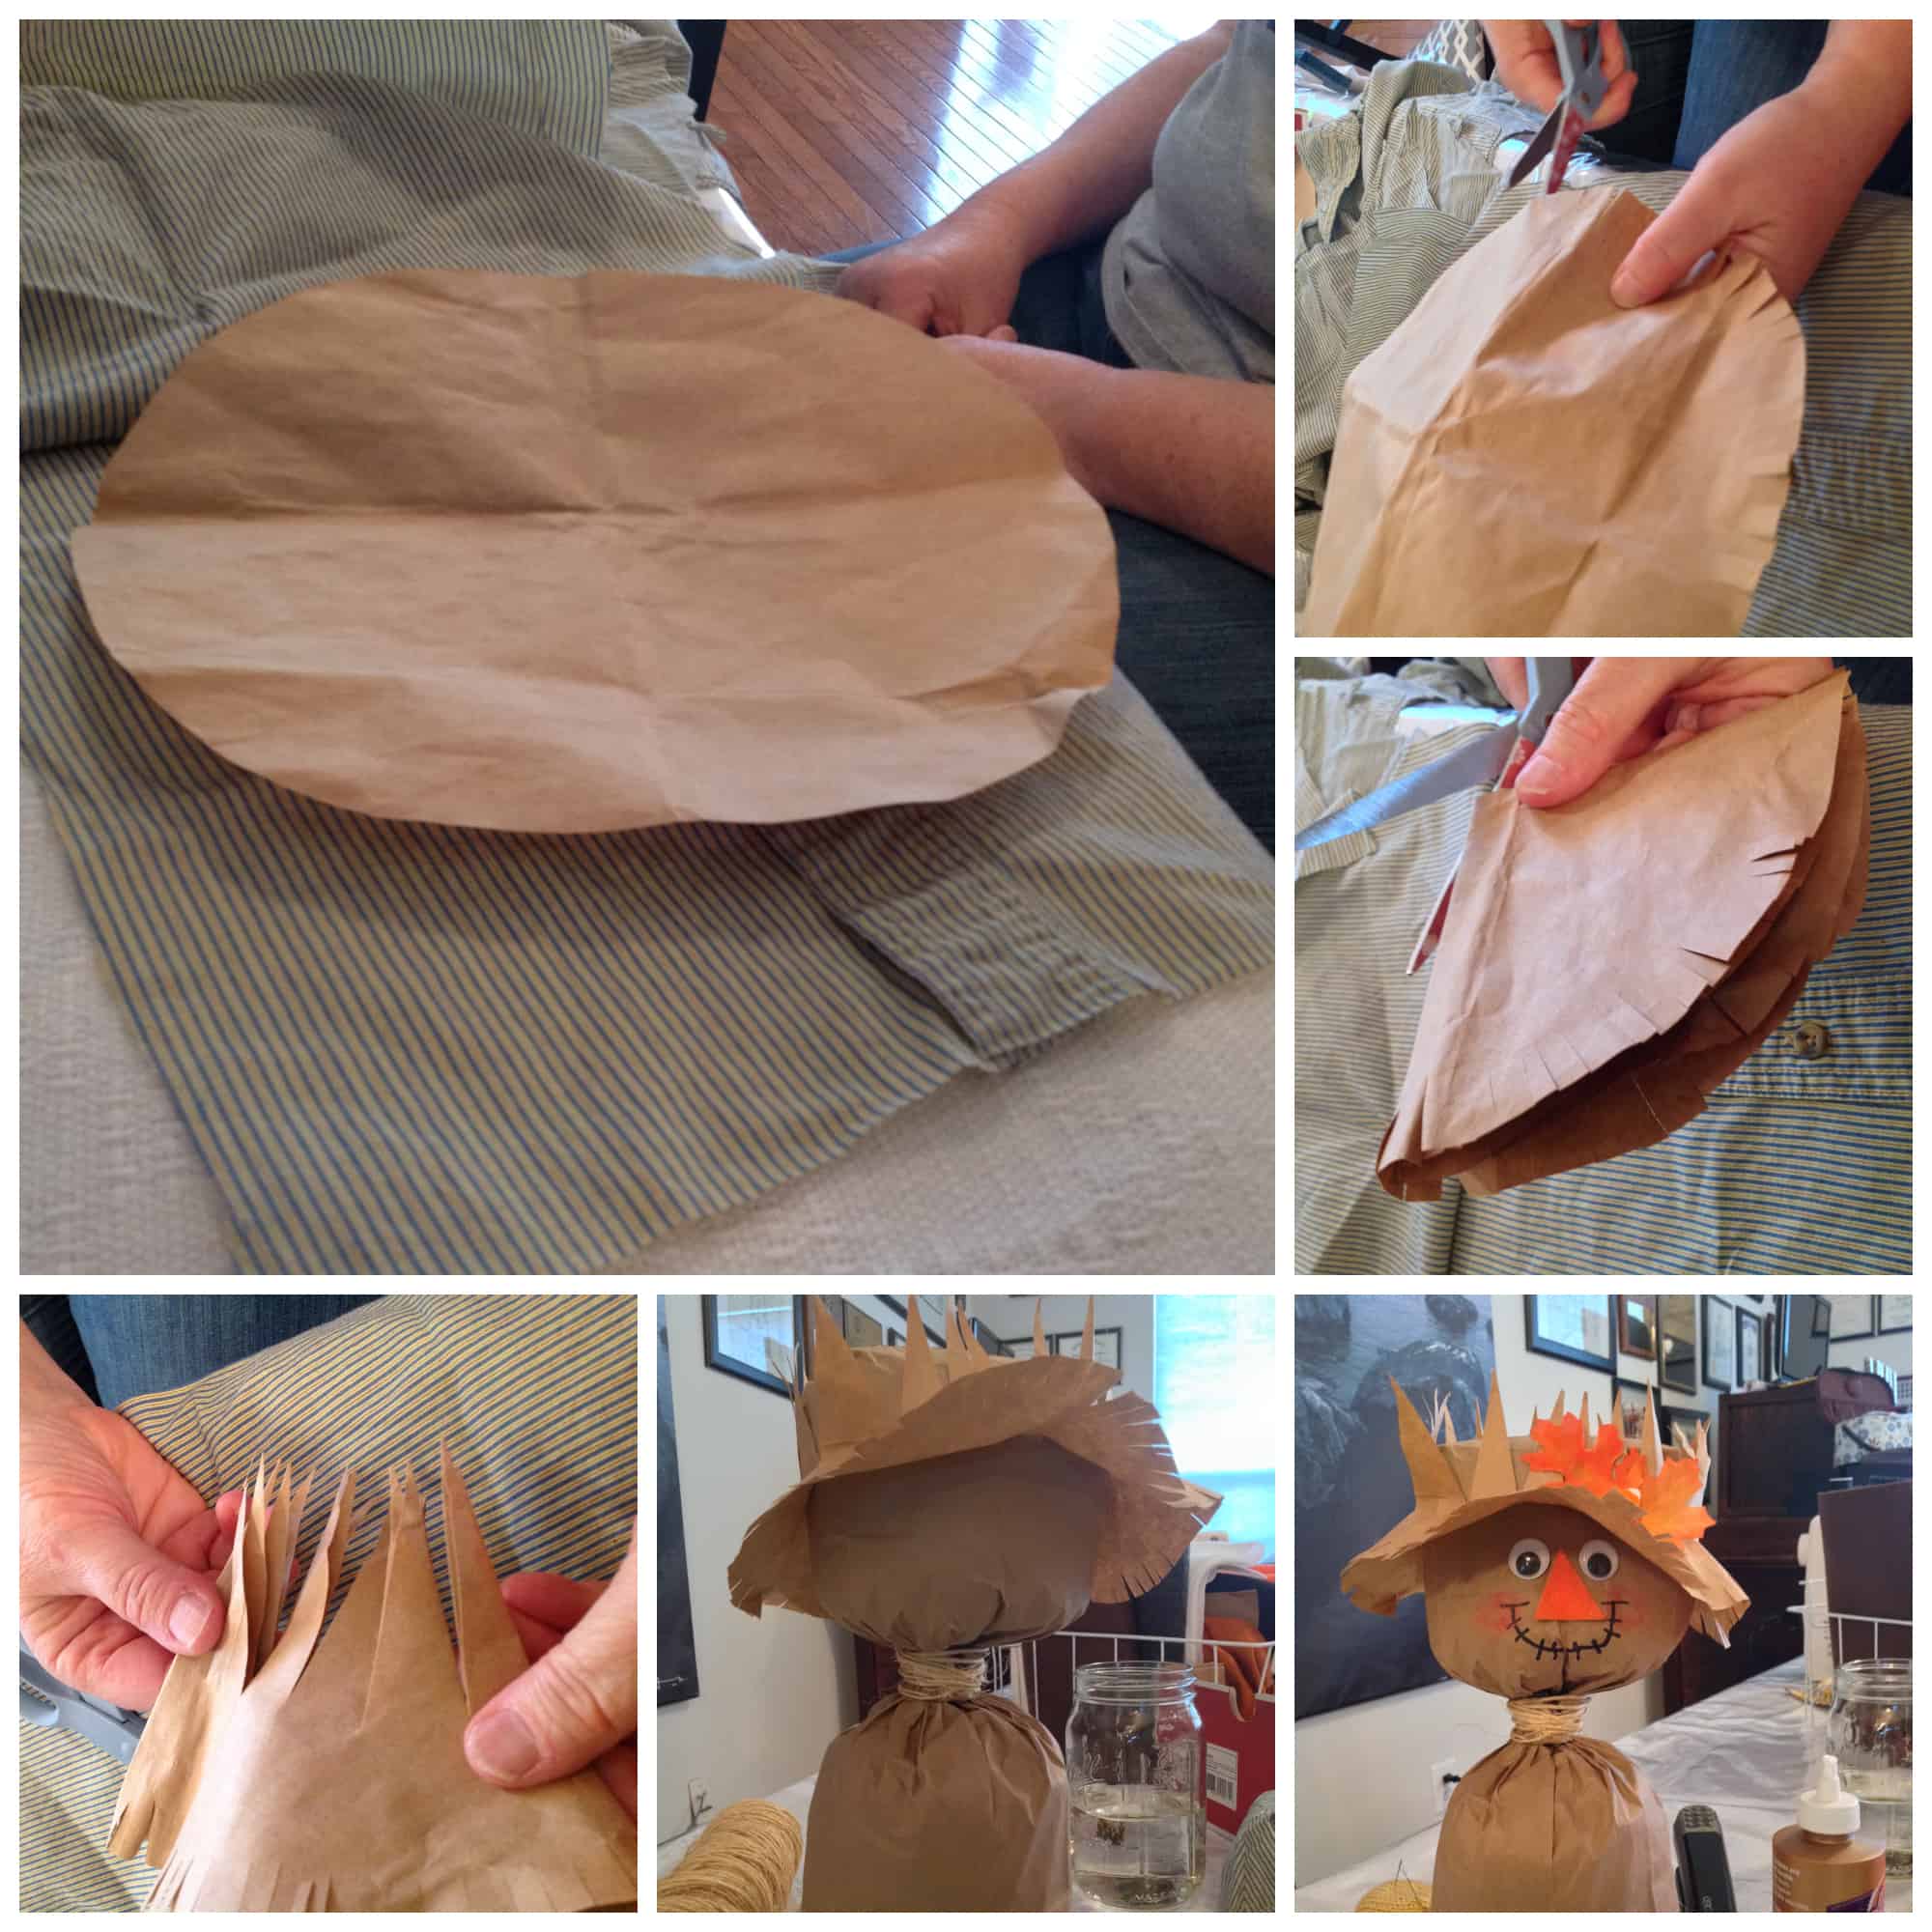
Step 6: Glue on googly eyes (or draw them) and draw a face. If you have a pink or red crayon, shade in circles to make rosy cheeks (it makes a huge difference in the end result!).
Step 7: Grab your fabric and cut a large rectangle to use as a shirt, you want it to be about 3 times as long as the body and twice as thick. Starting at the center, cut a “T” shape, with the longest line of the T, cutting all the way through one side of the fabric, leaving it split into two sides.
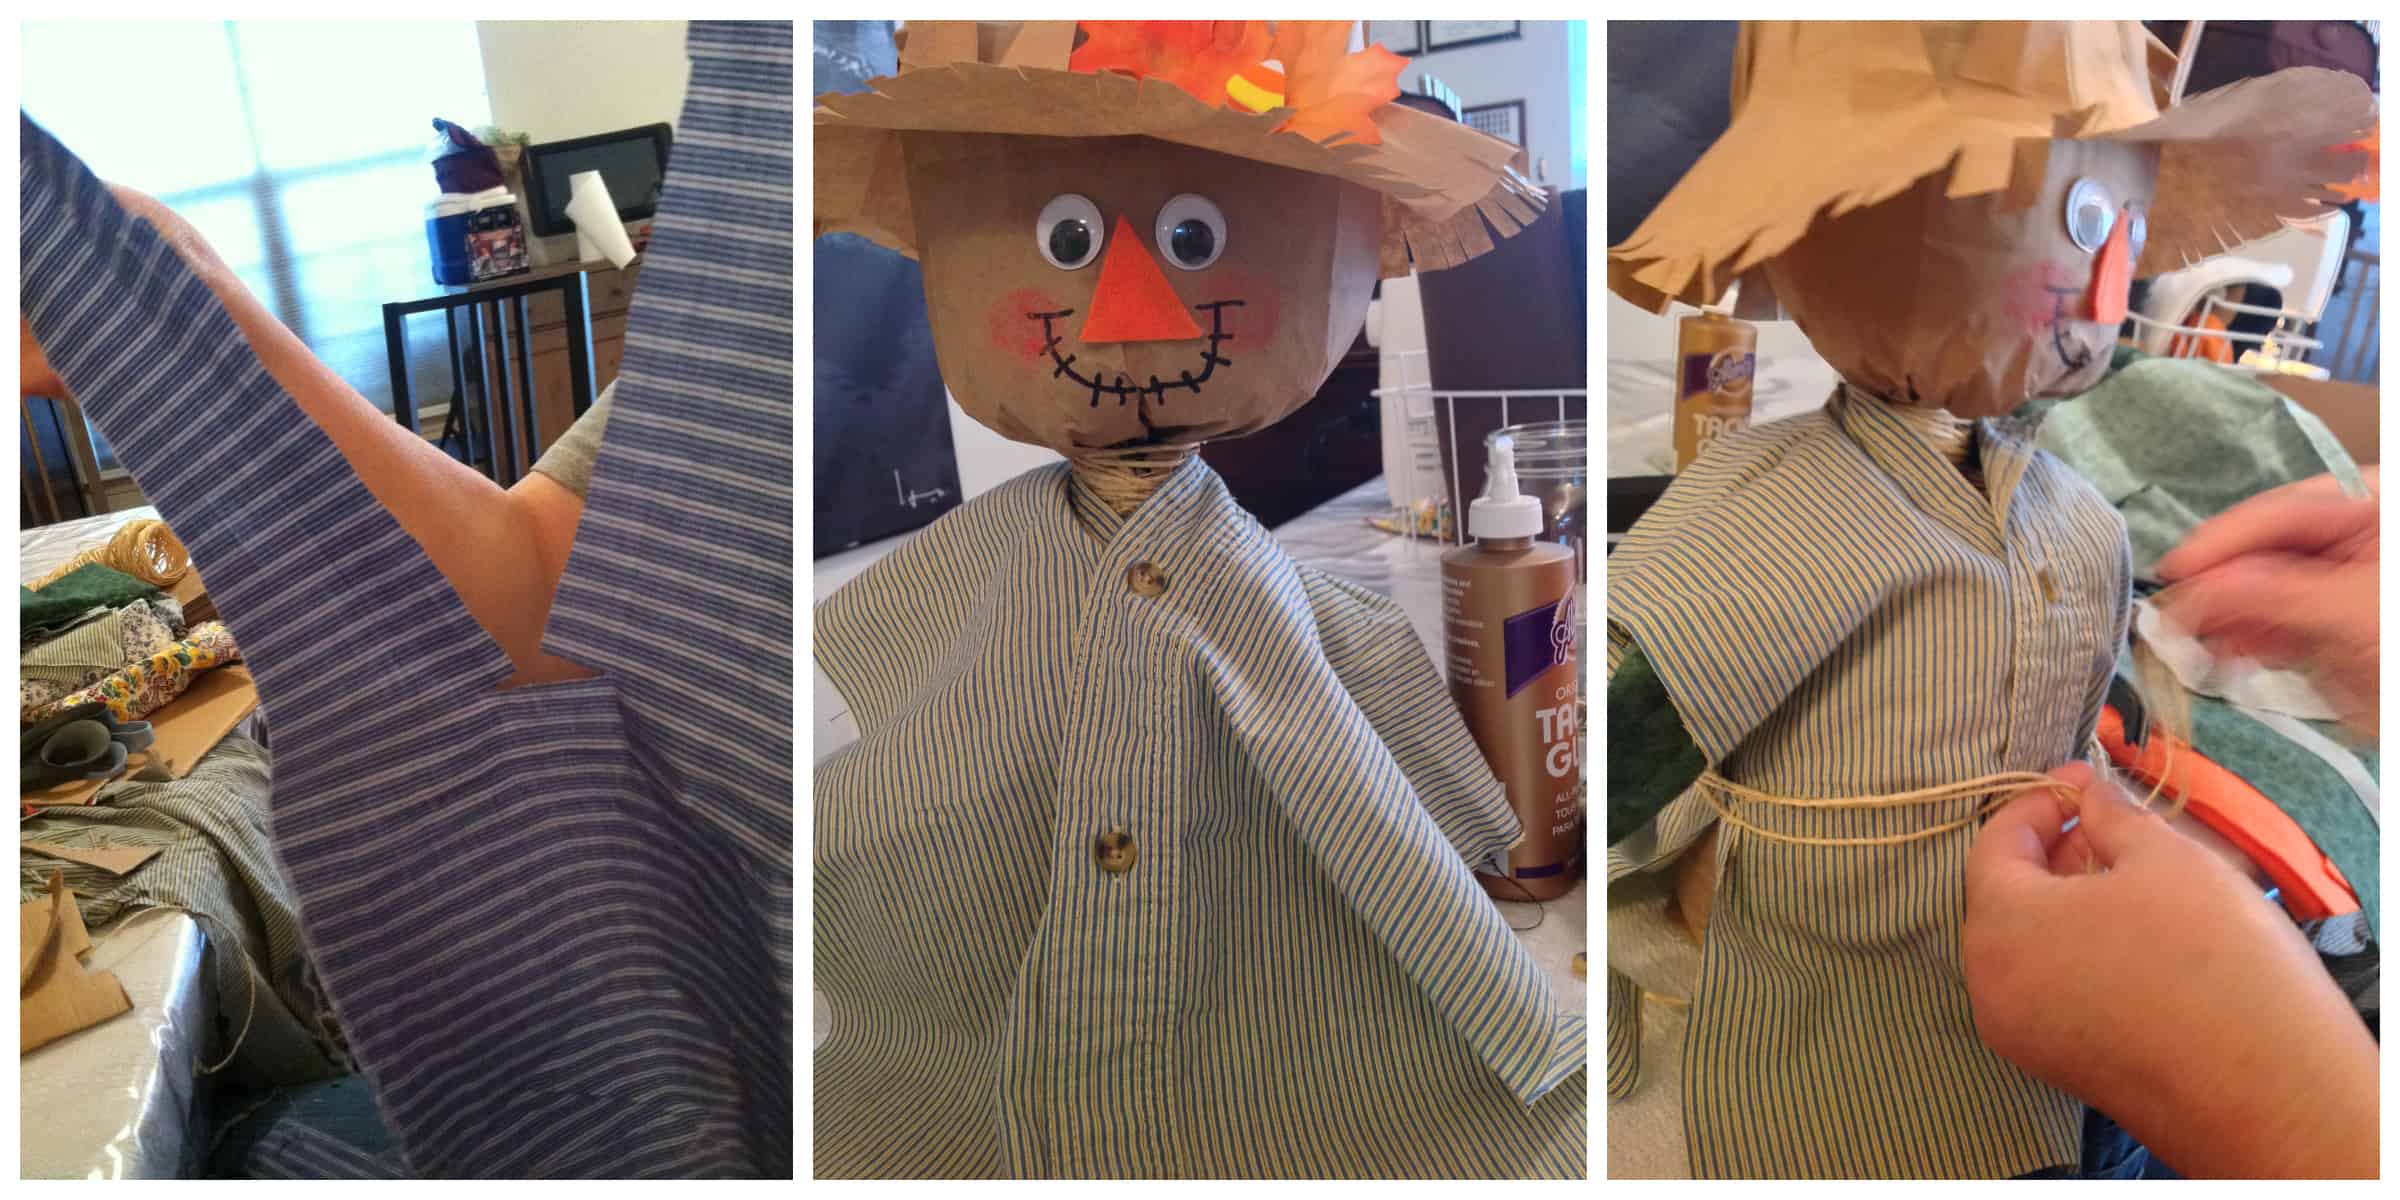
Step 8: Wrap the fabric around the body like a jacket. Cut a long thin strip of fabric to use as a belt to tie the jacket in place. If you are using old clothes instead of fabric, and you have a button down shirt, you can cut off the collar to make a collar for the scarecrow and use the front buttons instead of cutting out a T.
Your scarecrow is all done! Set him up indoors and enjoy the fall season!
Come follow me on Facebook for more budget tips, tricks, recipes and projects!
This post may contain affiliate links. If you click & make a purchase, I receive a small commission that helps keep the Busy Budgeter up and running. Read my full disclosure policy here.
[…] Halloween decoration for your kid’s room or living room and they cost almost nothing to make. Busy Budgeter shows you how to make a paper bag scarecrow out of some old clothes and […]