Blogging and coffee go together like peanut butter and jelly. They were just meant to be together.
Or better yet, blogging and hot cocoa sprinkled with dark chocolate flakes, mini marshmallows, a shot of vanilla syrup and piles of whipped cream. That works too.
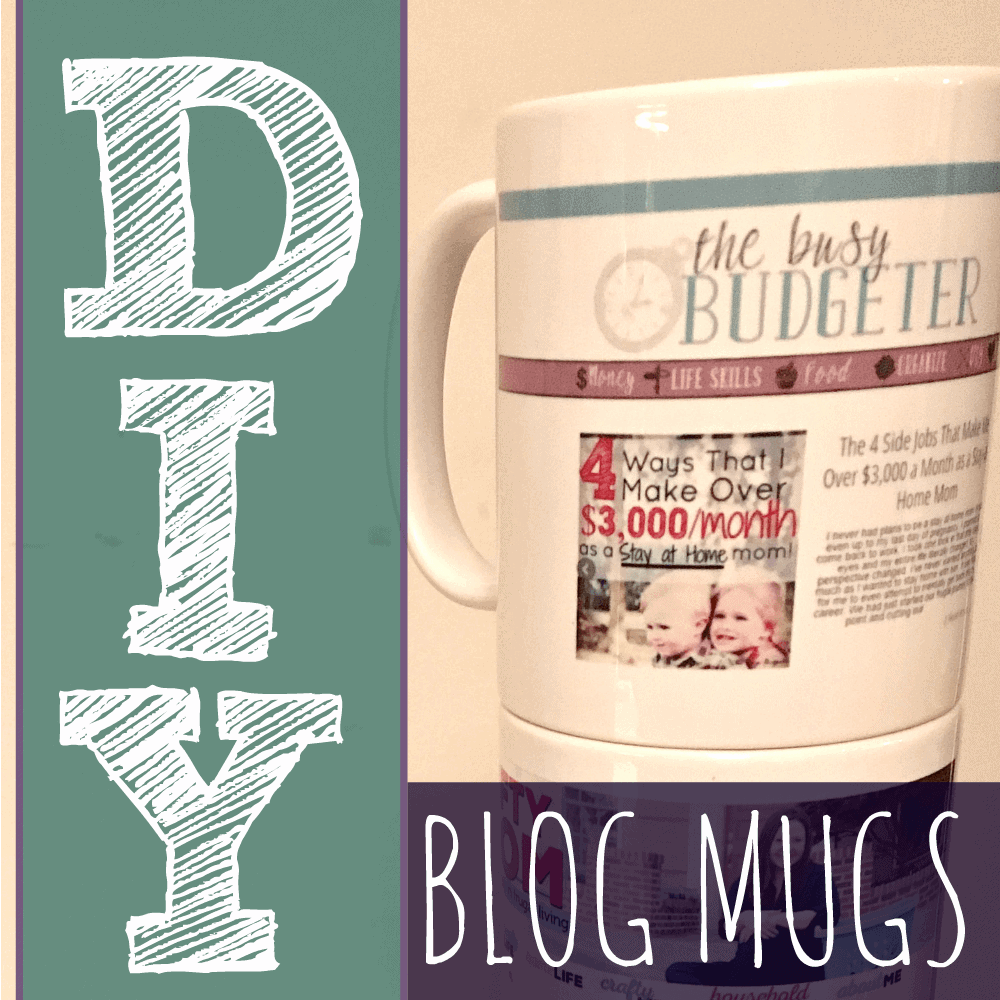
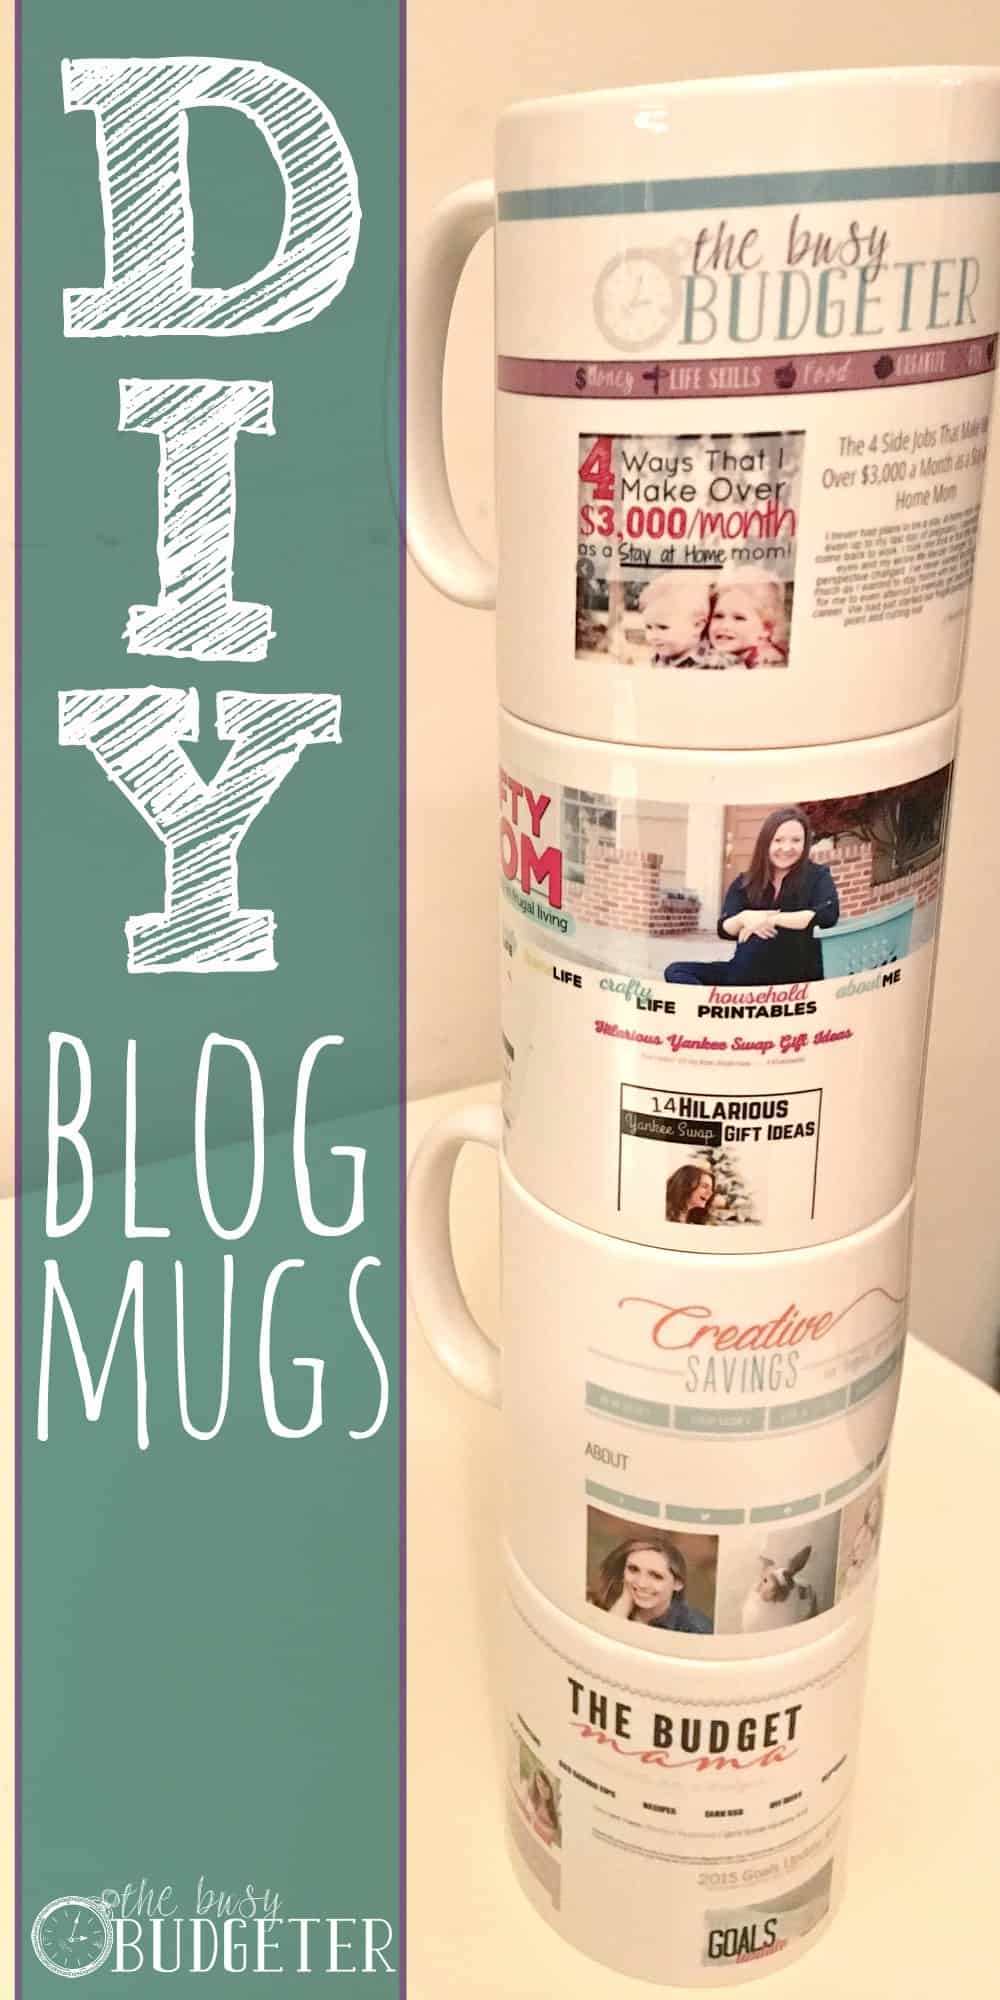
I was looking for a unique way to commemorate the accomplishments that I made this year on The Busy Budgeter. I wanted something I could keep, but that would also be useful since I seriously hate clutter.
I had originally planned to order a coffee mug with just my logo on it, but then I realized that I could make this so much cooler! Because really, everyone has a mug with their logo on it!
I made a mug with my blog on it instead. As in, the actual website displayed on the mug.
It’s crazy easy and surprisingly cheap!
Here’s how to make a DIY Blog Mug:
I also recorded a video for you so you can follow along if you need it…
Step 1: Install an ad blocker on your computer if your website runs ads. That way your mug doesn’t have an ad displayed on it. Ad blockers are free and easy to install. This is the one I use for Google Chrome.
Step 2: Go to your website and choose the page you want to capture. The two best pages to choose from on most blogs are either your main page or your about page. Feel free to have a collection of these though with your favorite posts displayed.
Step 3: When the page is loaded the way you want it displayed on your computer, hit the print screen button. Print Screen is a key on your keyboard often abbreviated as “prt sc”. It’s on the upper right-hand side of most keyboards.
Step 4: Open the “paint” program. (This is the old school program that all windows computers come with.) Hit the paste button and an image of your blog will come up. (Remember, if you aren’t sure what I mean. just watch the video above and follow along.)
Step 5: Crop the image to remove things that aren’t your website (the toolbars and other browser tabs). Then press save and name the image.
Step 6: Go to Shutterfly.com (you get also get 50 prints for free if you use this link and you’re a new customer).
Step 7- Click the “photo gifts” tab, and then choose mugs in the drop down bar once you’re on Shutterfly.
Step 8- Scroll down until you find this mug (it’s on the second line for me).
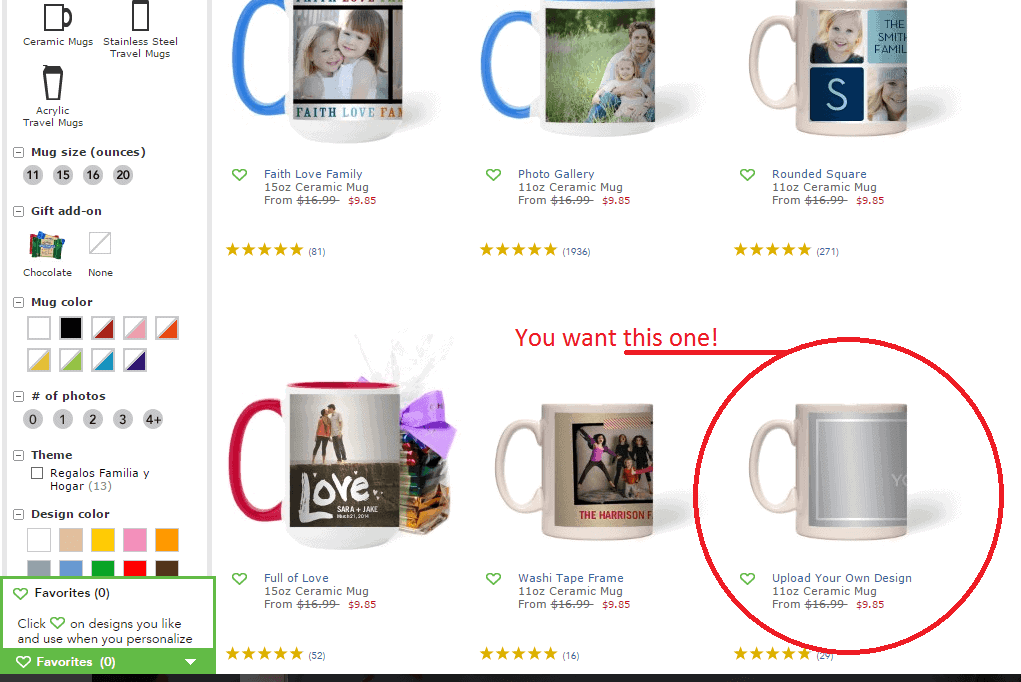
Step 9: Upload the “paint” photo of your website you just saved.
Step 10. Preview the mug.
Step 11. Order the mug. The cost is $16.99, but you can get 50 free prints with this link. (Hint: If you order before 12/7/15, you can get 40% off the mug using this link! (even if you aren’t a new customer!).
Enjoy your completely awesome blog mug.
Did you have any big blog accomplishments to celebrate this year?
By the way… If you want to see my monthly income reports and know what’s working for me and what’s not… Sign up for my Blogging Newsletter. I went from $18/month to $6,533/month in blog earnings in 14 months. You can get a free copy of the resource guide of what I used this year that worked for me. You can sign up by entering your email address below.
Links included in this post may be affiliate links, which means that I could be compensated in some way if you choose to make a purchase. Thank you so much for supporting The Busy Budgeter!
Okay, I TOTALLY want one. I’ve had lots of big accomplishments this year too, right? So early Merry Christmas to me?
Very clever idea!!
What a great idea! This would make a great gift, too!
It’s seriously a cute idea! So fun and great for the holidays!
What a great idea! I love the mug.
What an awesome idea!!!!
Cute tutorial and something unique for bloggers.
What?!? This is so cool! Now I need one because I literally cannot blog without my coffee.
These are so cute!!! Now I know what to get all my blogger friends!